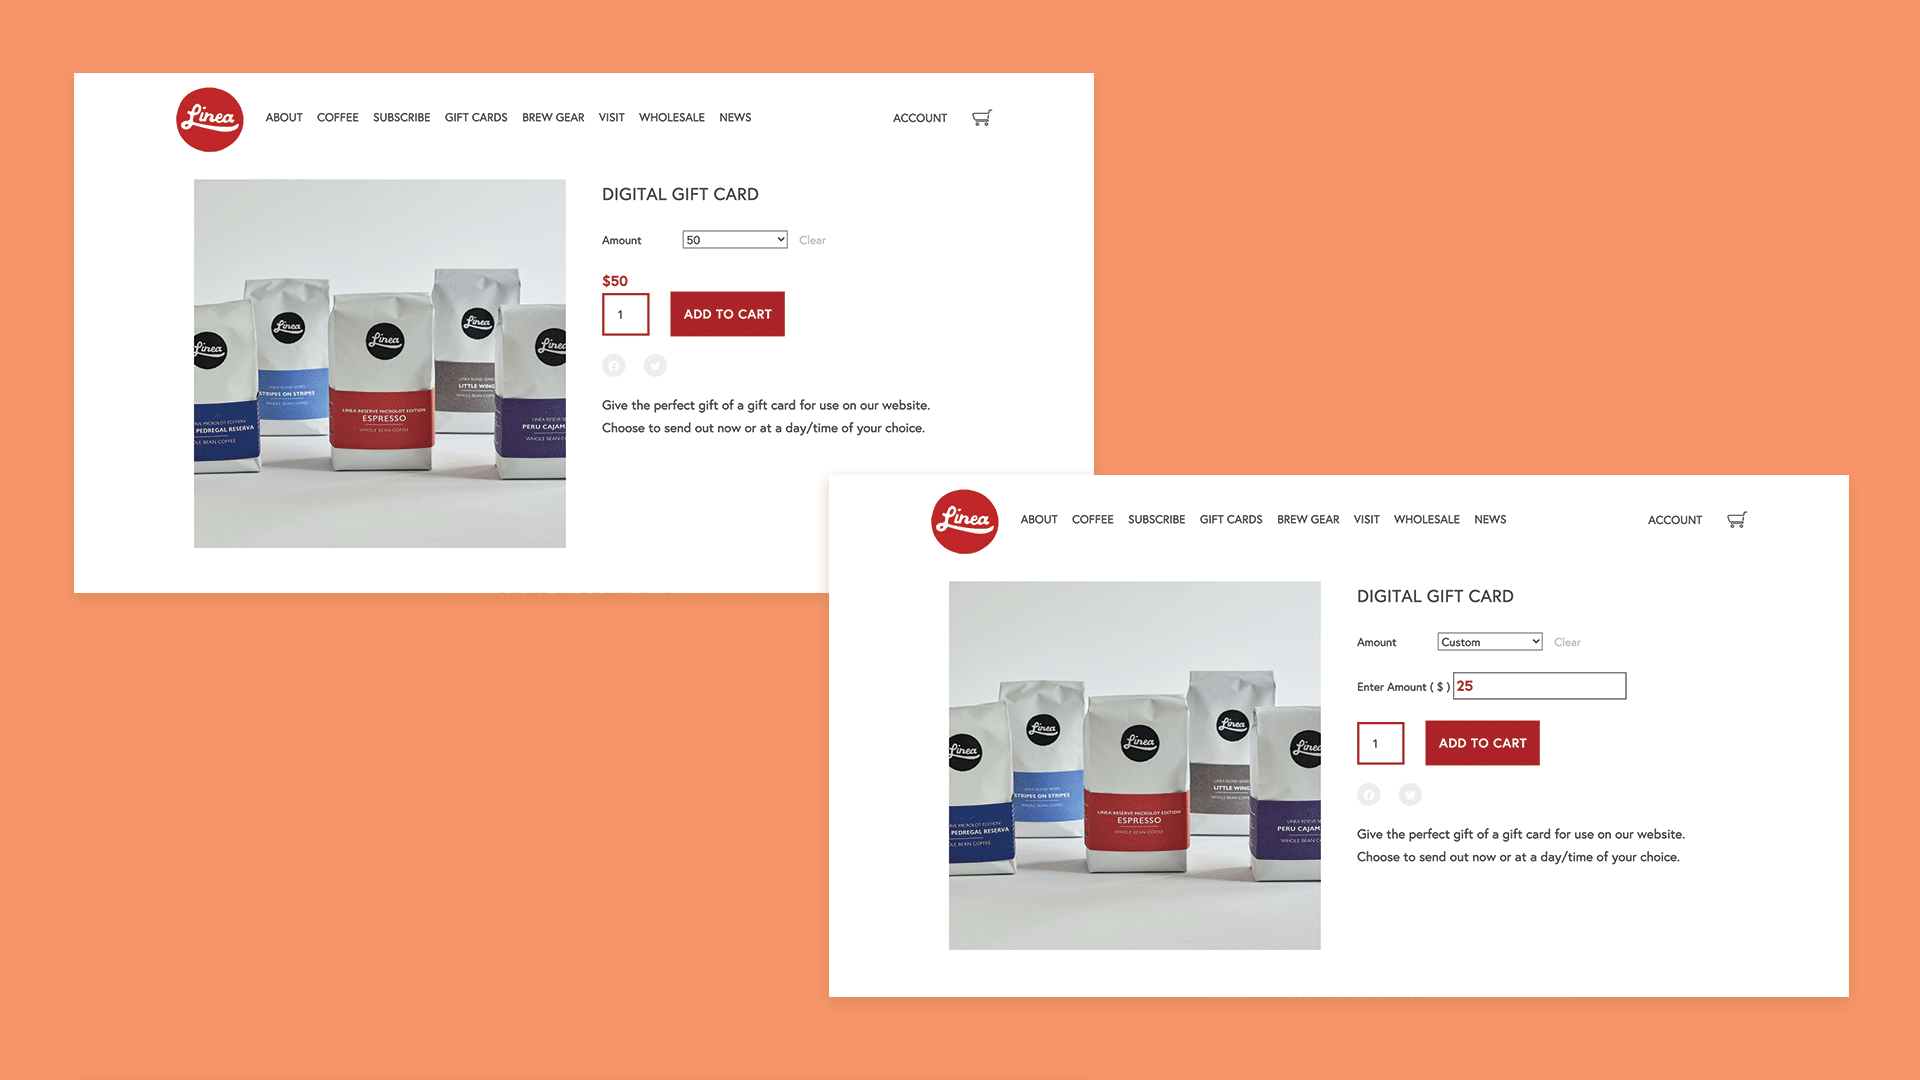
There are a myriad of reasons to sell digital gift cards on your website right now. This guide is for anyone who has a WooCommerce shop and would like the recipe for adding gift cards to their website themselves. The specific product we’ll set up is a gift card that offers a handful of set amounts and the ability to enter a custom amount, just like the gift card our friends at Linea Caffe are offering.
The Ingredients
- Your WooCommerce website
- A license to Smart Coupons ($99/year)
- A license for Name Your Price ($49/year)
Note: This guide was written in December of 2020 and is based on WooCommerce 4.7.0, Smart Coupons 4.12.2, Name Your Price 3.1.7, and a deep desire to help small businesses right now. We’ll all get through this together!
Directions
Install Plugins
- Purchase the two plugins linked above.
- Download the .zip files (these should be available from your receipt).
- Log in to your website’s dashboard and go to Plugins > Add New.
- Click Upload Plugin.
- For each, click Choose File and select the plugin file from your computer.
- Click Install Now.
Brand Alignment
Before creating your gift card product, let’s be sure to take time to craft the visual design and language to match your brand.
- Go to WooCommerce > Setting > Smart Coupons.
- Choose from the pre-selected colors or add your own brand colors.
- Choose a coupon style and double check the colors align for the style for email.
- Choose where you want customers to see their optional gift cards and coupons.
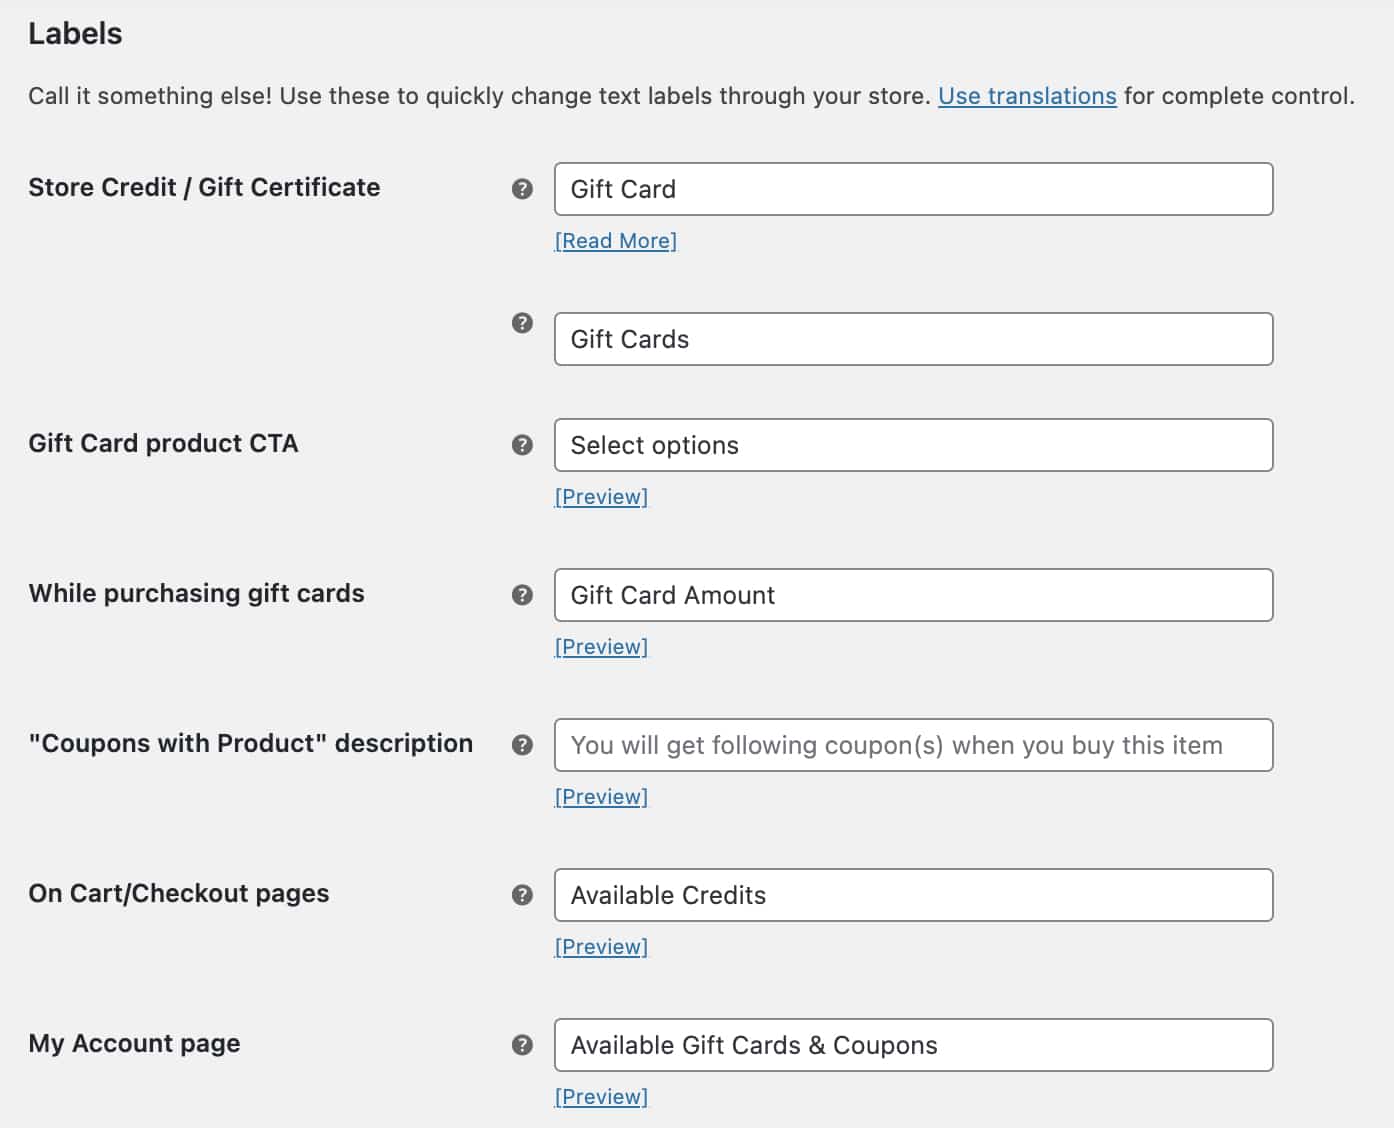
- Update the language under Label. This adjusts the words used throughout your website. We tend to use clear language, such as Gift Card and Available Gift Cards & Coupons.

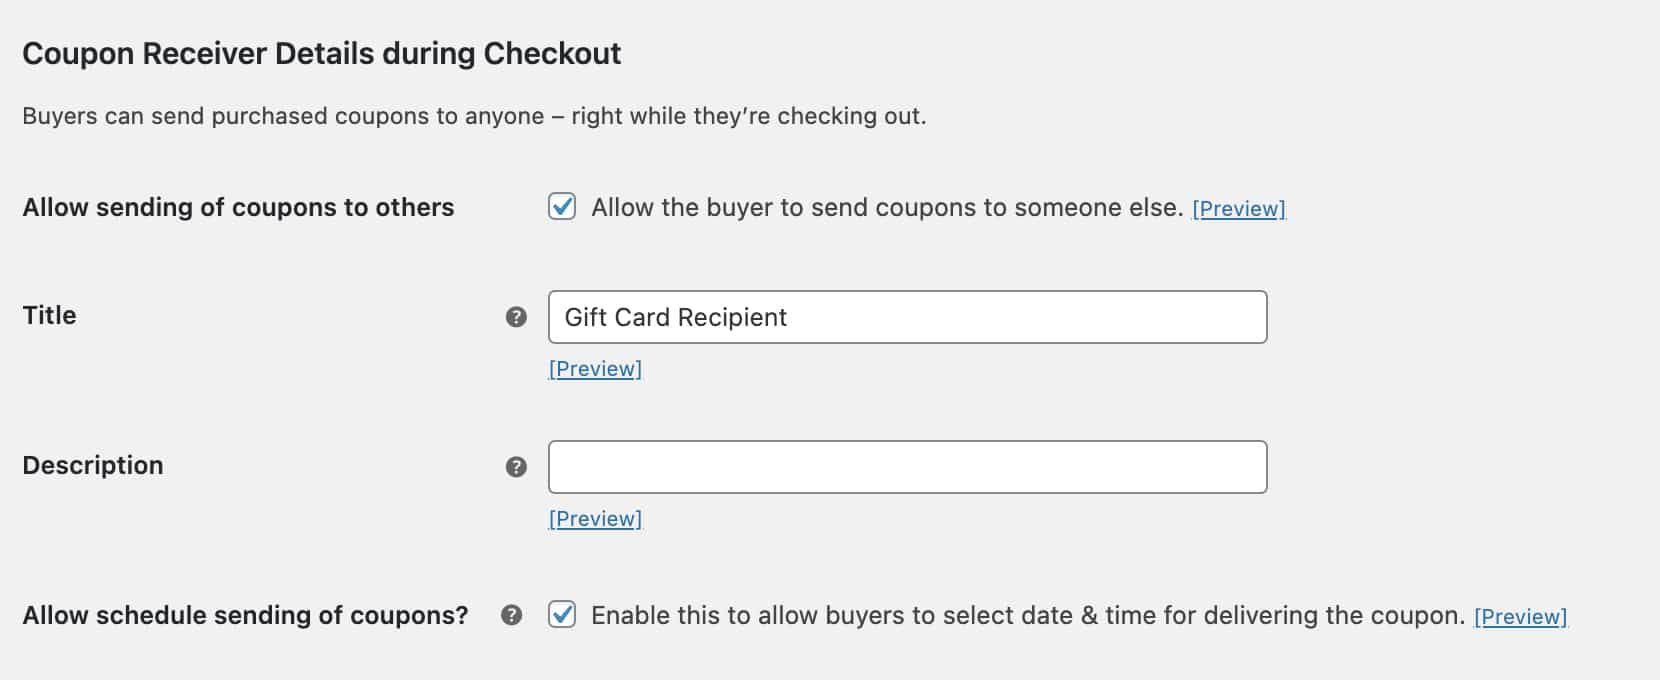
- Under Coupon Receiver Details during Checkout be sure that both Allow the buyer to send coupons to someone else and Enable this to allow buyers to select date & time for delivering the coupon are checked.

- Click Save changes.
- Now head up to the Emails tab. Make sure that your brand colors and logo are entered at the bottom of the page. This will make sure that your transactional emails (including Gift Card notifications) are aligned with your brand.
Set Up Gift Card
- Log in to your website’s admin area.
- Head to Marketing > Coupons.
- Click Add coupon.
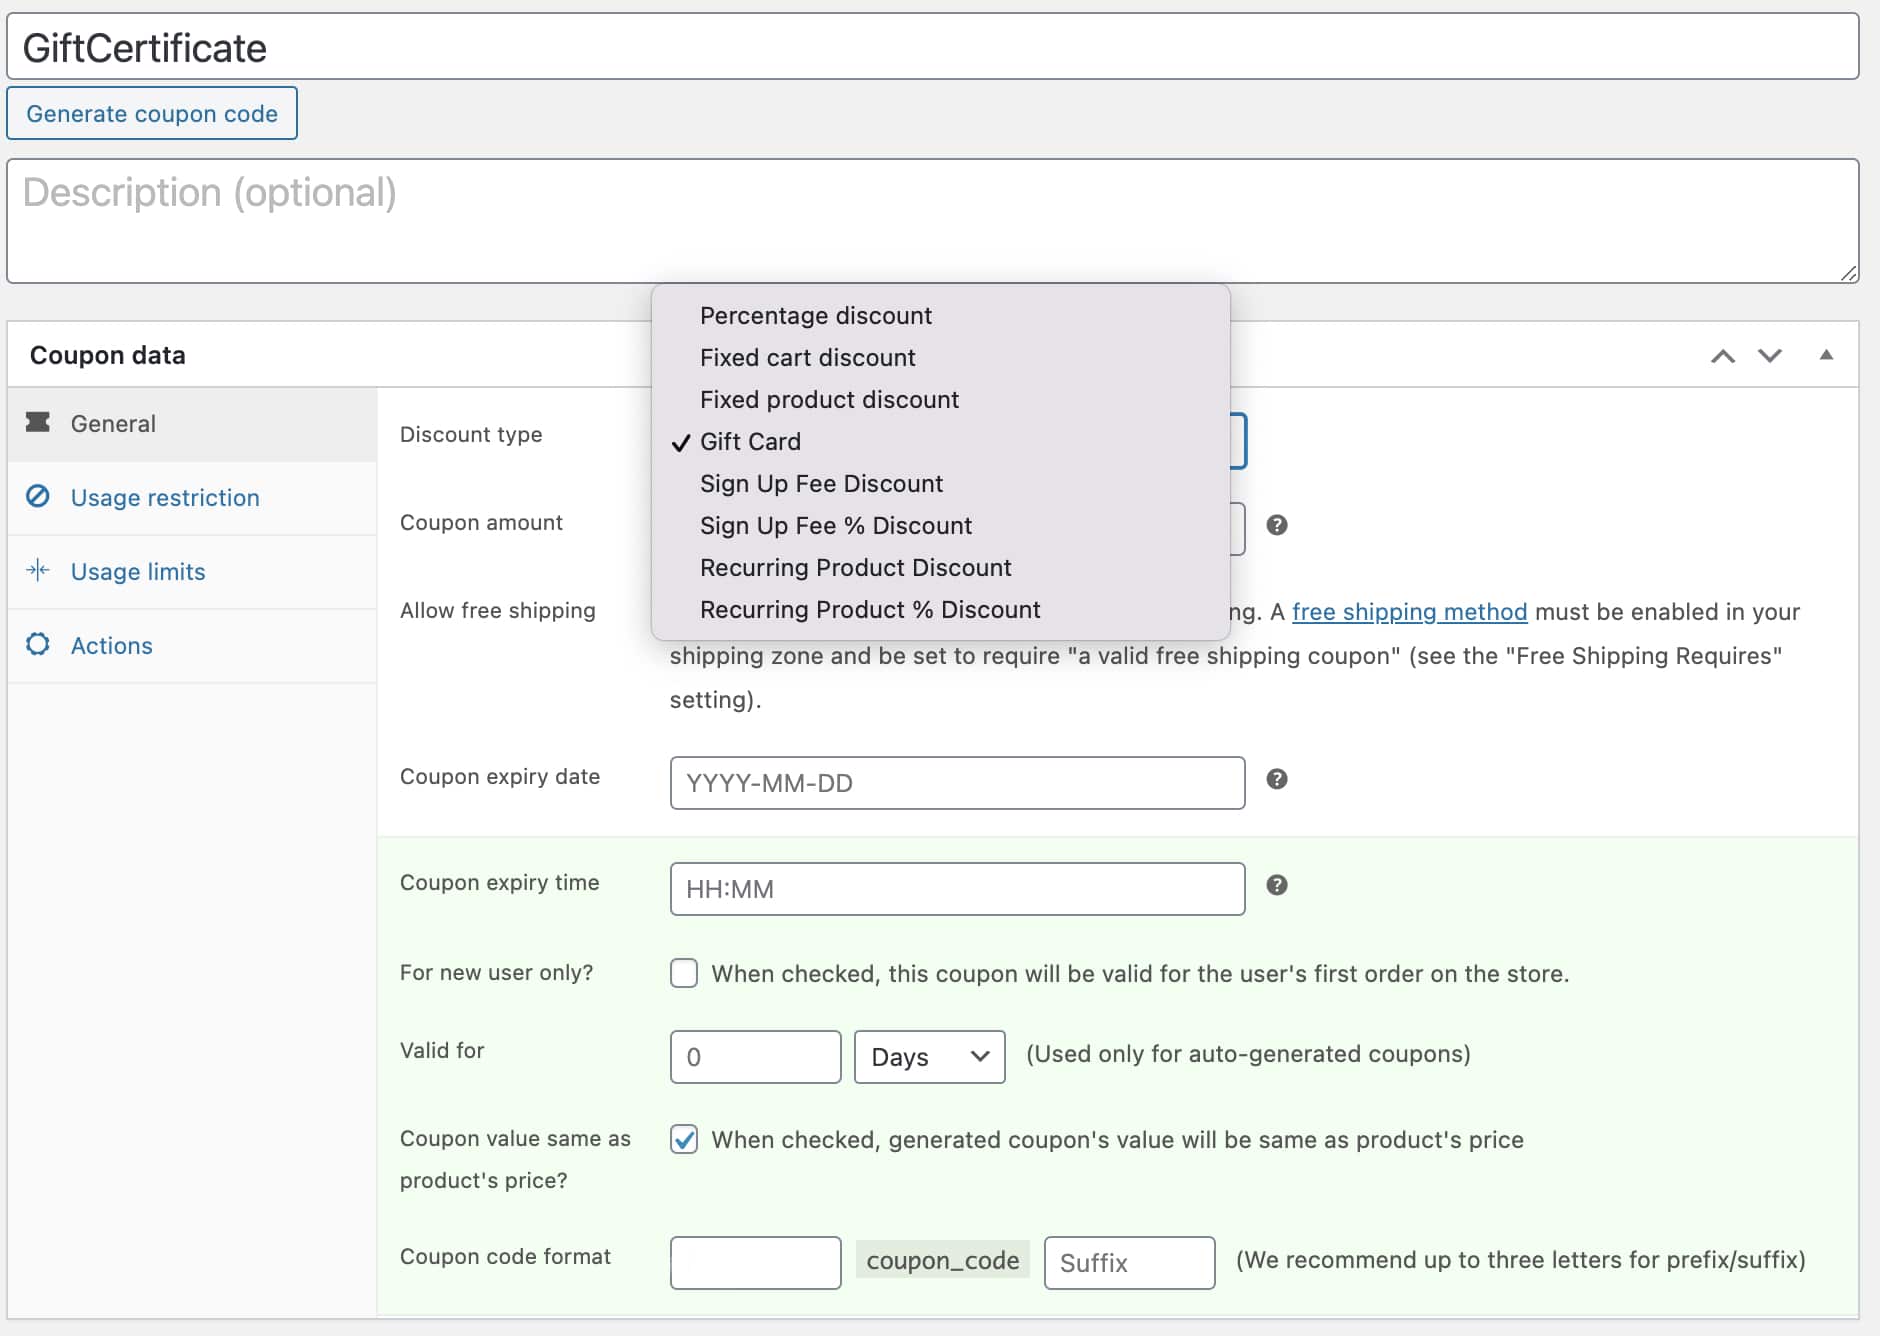
- Add a title with no spaces (ex: GiftCertificate).

- For Discount Type, choose Gift Card.
- Leave Coupon Amount blank.
- Check the box for Coupon Value Same as Product’s Price?
- Optionally, enter a prefix or suffix.
- Click Usage limits.

- Set Limit per user to 1.
- Save your coupon.
Set Up Product
- Head to Products > Add new.
- Fill out the Product name, description, Product category, Product image.
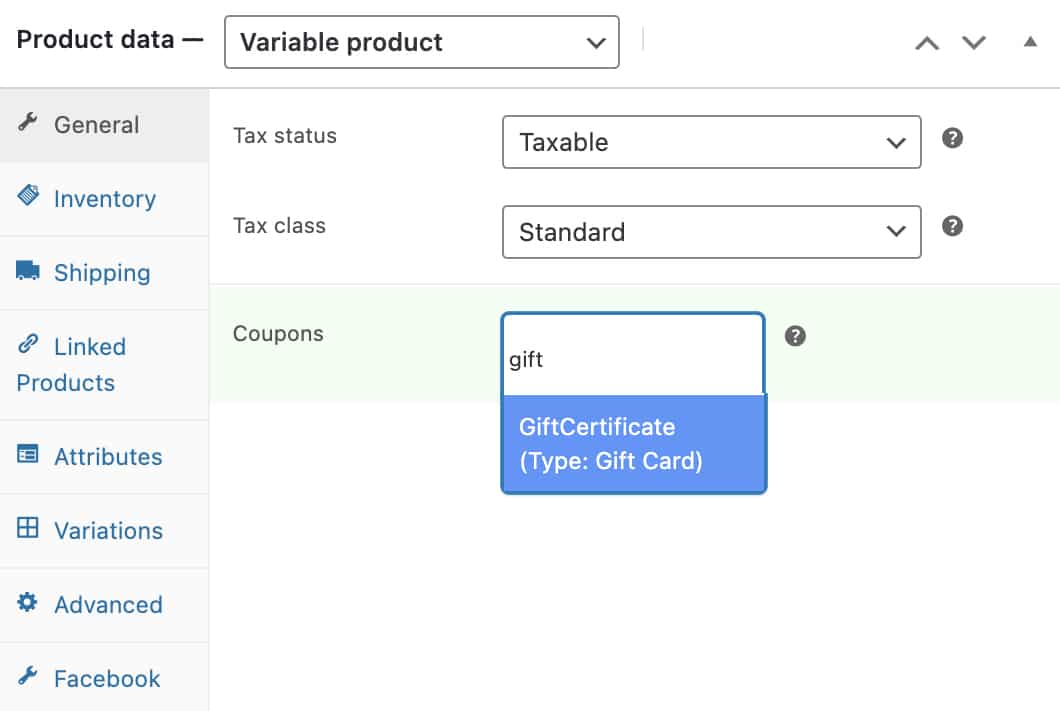
- Head to Product data and choose Variable Product from the drop-down.

- Under Coupons, search for your coupon name (ex: GiftCertificate).
- Head to Attributes, select Custom product attribute and click Add.
- Name the attribute (ex: Amount).
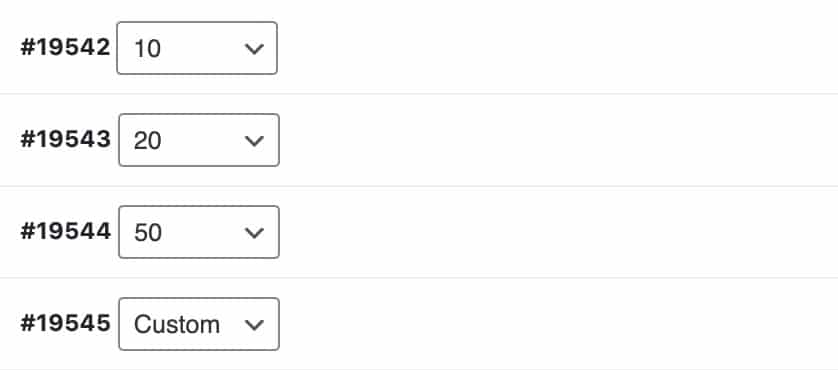
- Set values separated by a vertical pipe (ex: 10 | 20 | 50 | Custom). When choosing amounts, be sure that the lowest amount you offer is realistic for purchasing something on your website.
- Make sure Visible on product page and Used for variations are checked.
- Click Save attributes.
- Head to the Variations tab and chose Create variable from all options.

- You will see a variation for each amount you created. You can click on these to edit the individual variation.

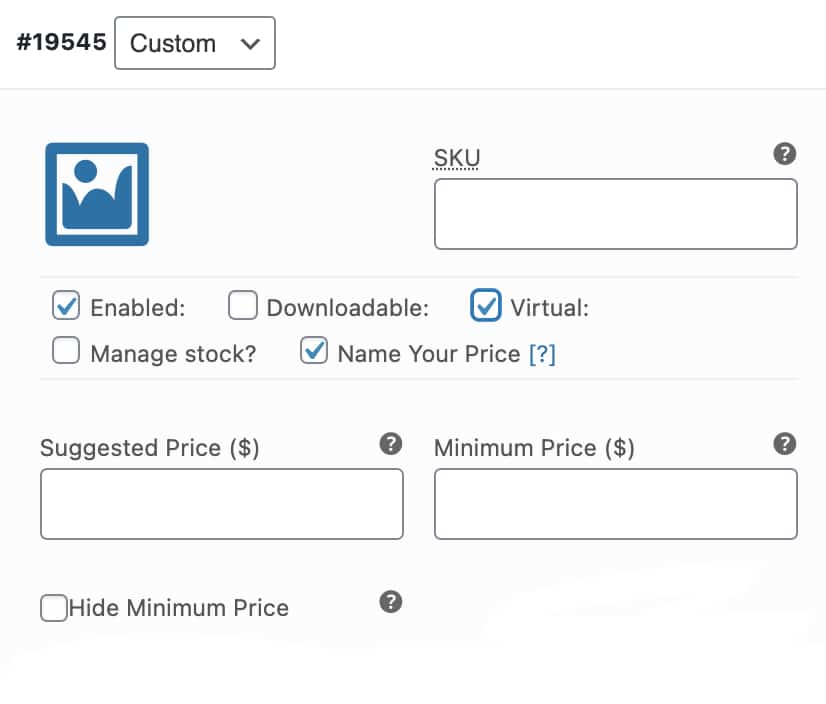
- For each variation, add the amount of the Gift Card and check Virtual (which keeps customers from being charged shipping for the gift card).
- For the Custom variable, check the box next to Name Your Price.

- Publish your gift card and start selling.
Enjoy
Once the orders start rolling in, you might wonder what the customer experience is all about. In a nutshell:
- Customers add your gift card to their cart and pay through your usual checkout.
- They can choose to either send the gift card to themselves or someone else.
- They can also choose when the email goes out to the gift recipient.
- Gift givers will also get a Gift Card sent Successfully! email.
- Joy will abound!
We wish you every ounce of luck, good fortune, and success in this holiday season. Go get ’em!


